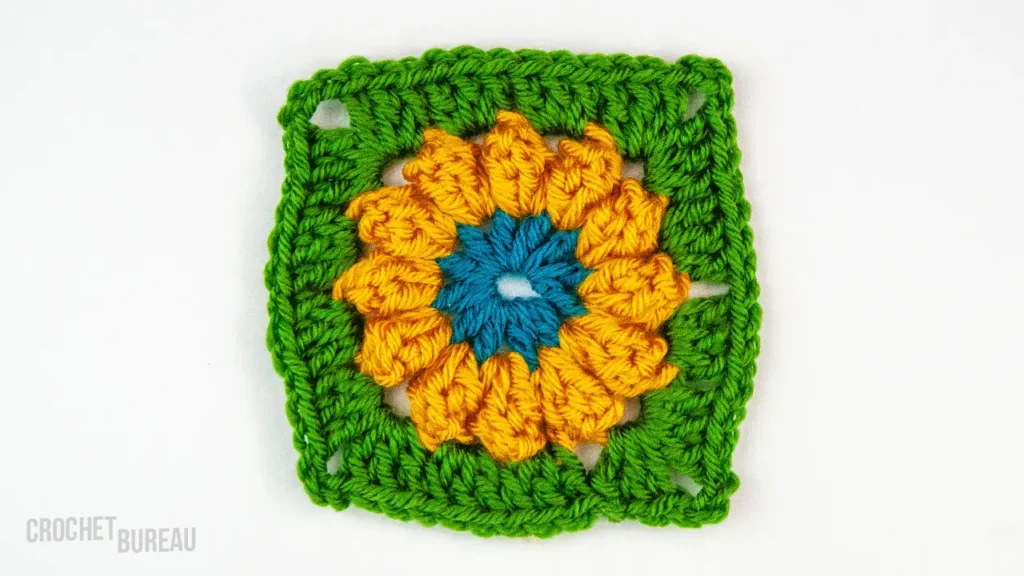
Granny square – this is usually called part of a large product: a blanket, a bag, a knitted pillowcase. It is usually knitted from the middle. If you knit it from thick threads, then such a square can also serve as an independent product. For example, a napkin under a hot mug of tea. In this tutorial, I present unique master classes on how to crochet a granny square with your own hands with step-by-step photos.
Materials and tools:
– yarn of four different colors;
– hook number 4.5
Abbreviations used in the text:
CH – chain
DC – double crochet
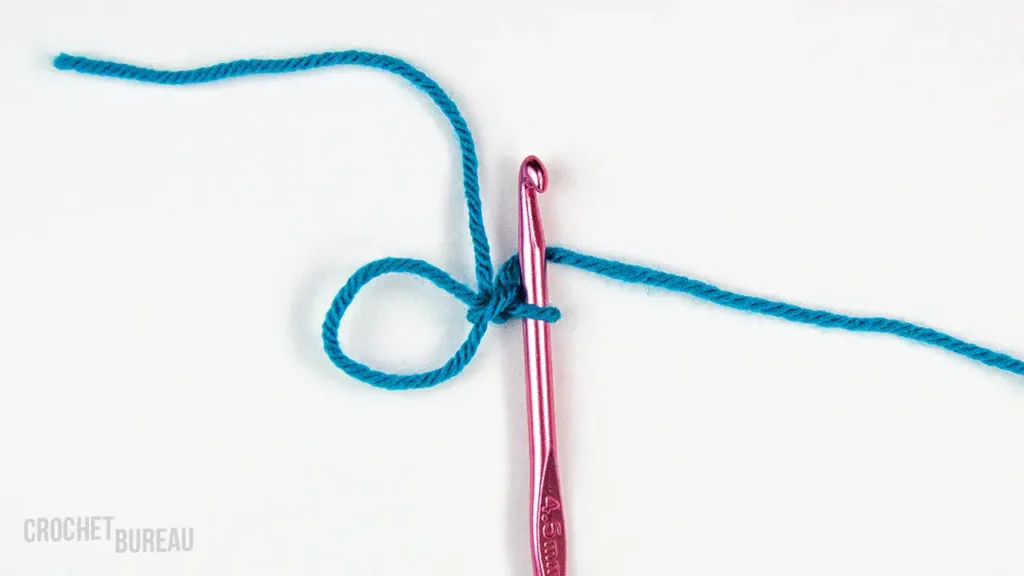
We start knitting a granny square with a magic ring. Holding the end of the thread in the left palm, we wrap the working thread once around the index finger of the left hand. We insert the hook into the ring, pick up the working thread, pull out the loop and fix it on the ring. See how to crochet patterns here.
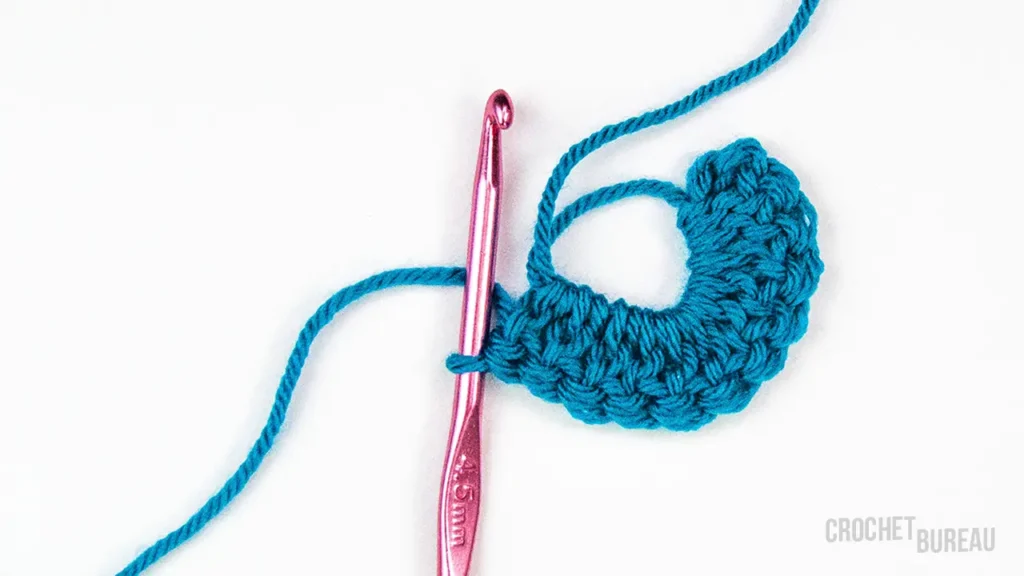
1 row. 3 ch, 11dc. Repeat until there are 12 dc on the ring (together with three air loops).
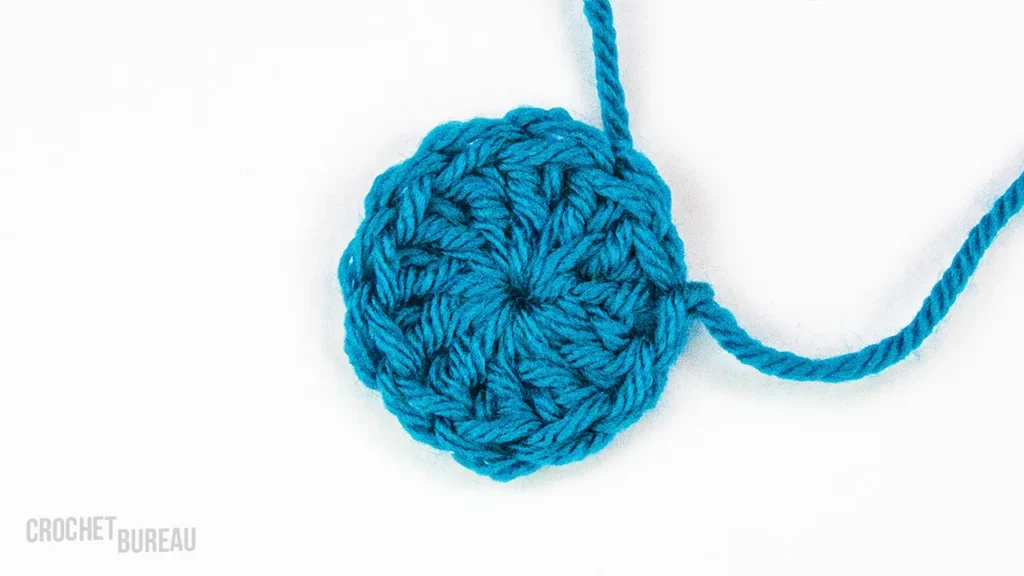
We knit the slip stitch into the third chain. We cut the thread and fasten it, after pulling the ring tightly at the free end.
2 row. In this row we knit the flower petals.
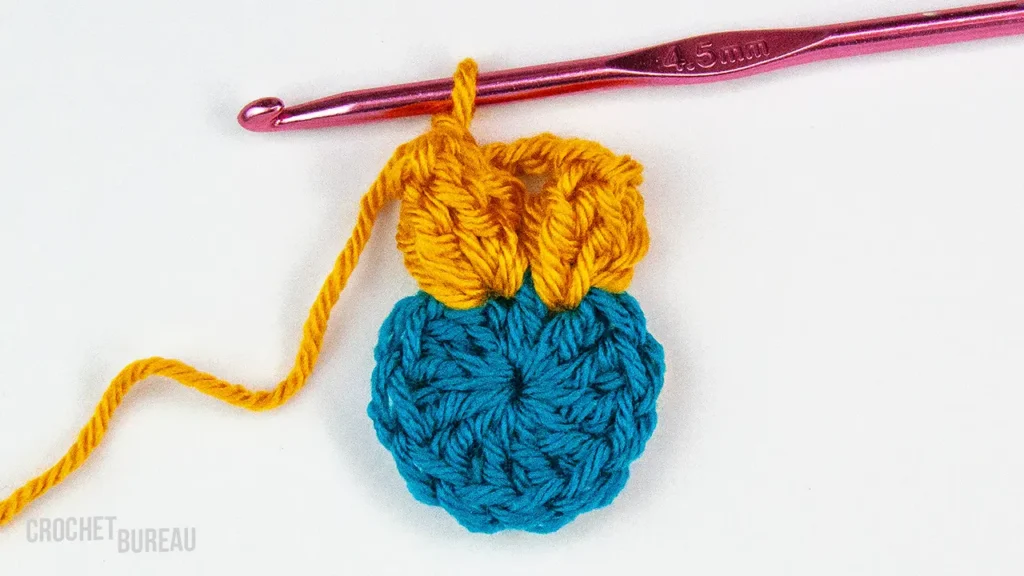
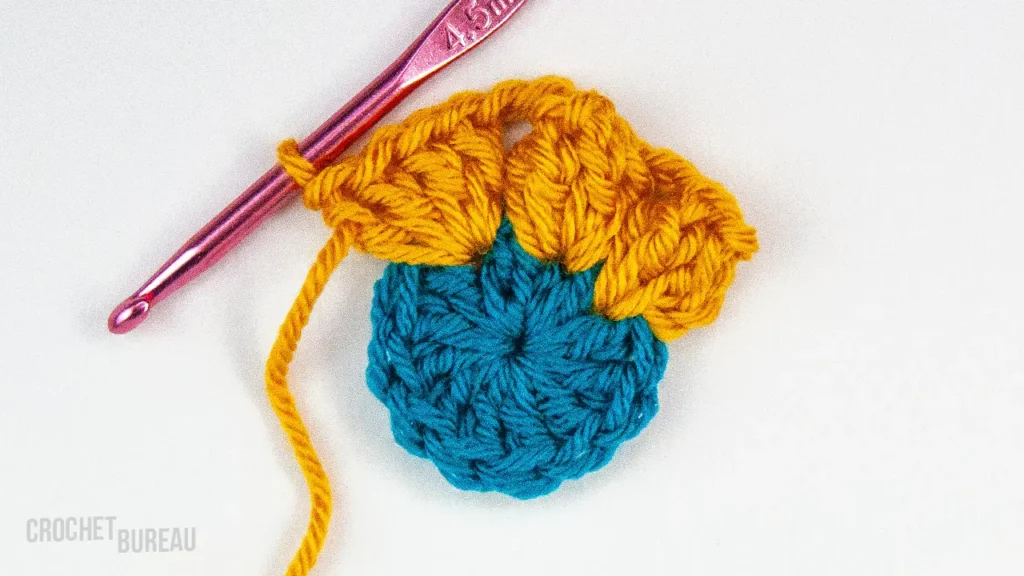
3ch, 3dc in the same loop. Turning the knitting, insert the hook into the upper loop of the lifting loops. Having seized the working thread, we knit a slip stitch into a loop on the hook.
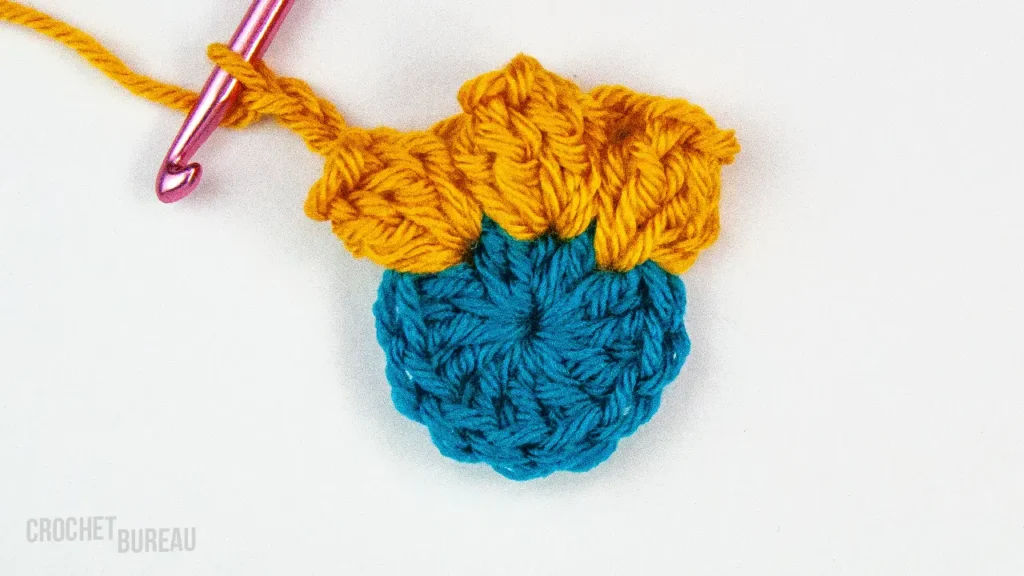
Next: 3ch, , 4 dc into the next stitch and we tighten all 4dc with a connecting slip stitch. Repeat to end of row. You should get 12 petals. We finish the row with a slip stitch. The thread is cut and fastened.

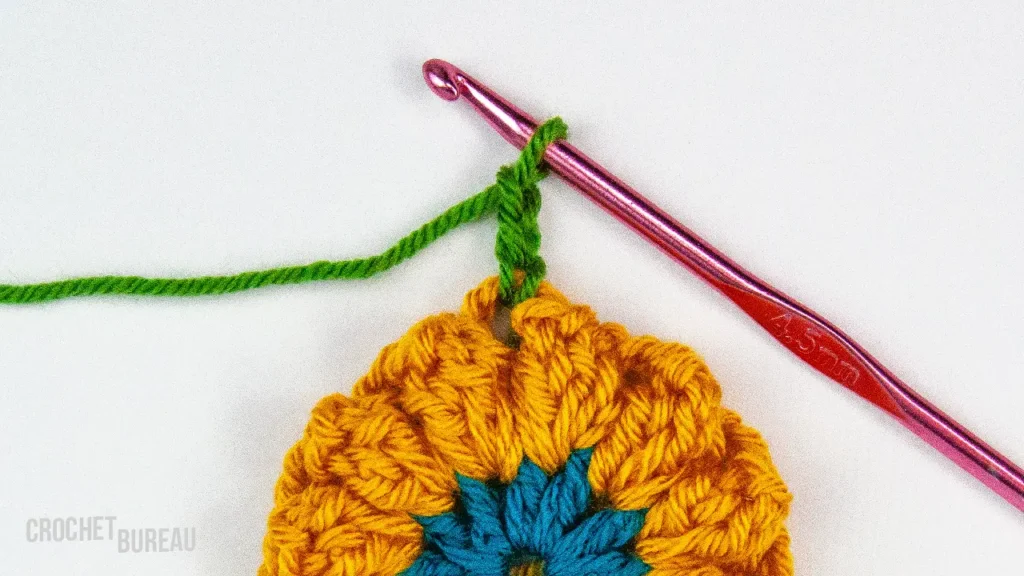
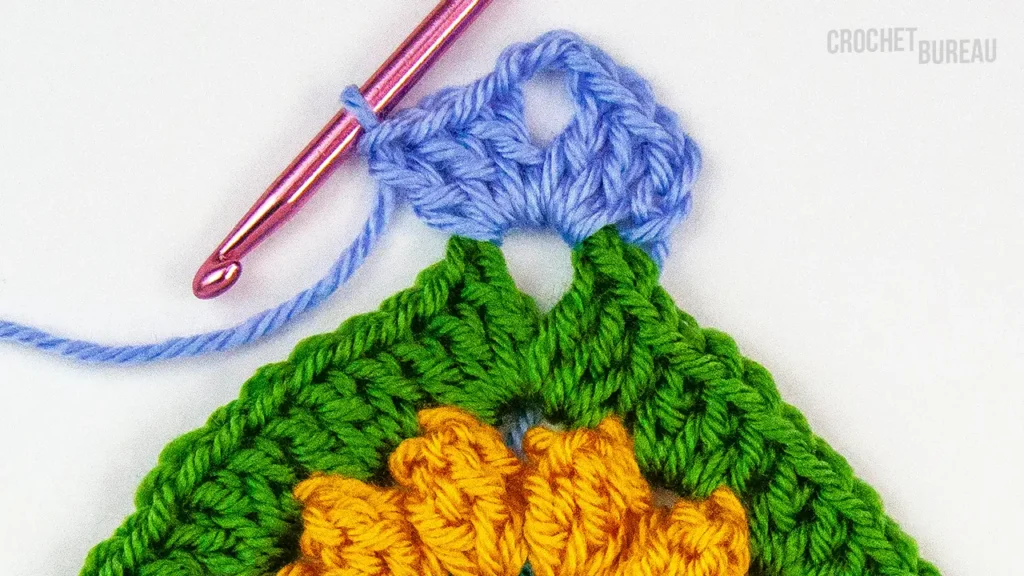
3 row. We begin to form a corner with a thread of a new color. We fix the thread with an air loop on the arch. We crochet 2ch.
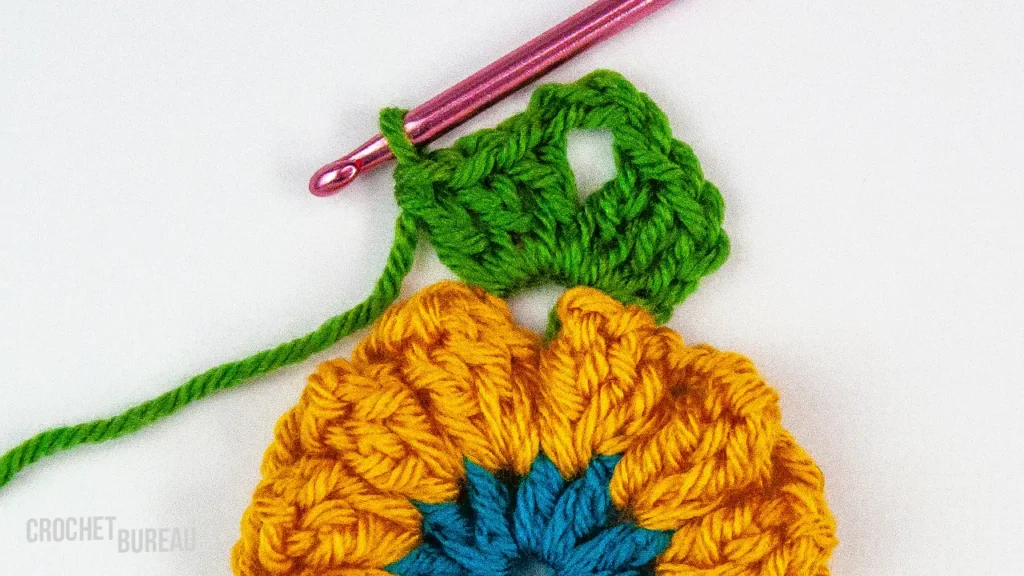
In the same arch we crochet 3ch and 3dc. 1ch, in the next arch 3dc, 1ch, 3dc in the next arch, 1ch, corner of two parts, between which 3ch. They tied one side of the square, on each side there were two sockets. Having knitted three more sides of the square, we perform a connecting loop in the third ch of the first outlet of the corner. Cut the thread and fasten.
4 row. Change the color of the thread and start the row from the corner.
We knit similarly to the third row, the only difference is that there are three rosettes on each side between the corners. We cut the thread and fasten it, hiding the end on the wrong side

Video tutorial
Version 1
Version 2


